Wednesday, September 26, 2012

Blueberry-Cream Muffins

Blueberry - Cream Muffins


Listed under the B tab for breakfast, this recipe is a hidden gem! 

This recipe looks like it came from another newspaper. My Mom said she never made these muffins, but that she had cut out this recipe before she got the recipe she now uses. Everyone in my family knows we only have blueberry muffins on Christmas morning. It's a tradition that everyone looks forward to. However, that recipe is not something my Mom shares frequently! I would say these muffins are definitely the runner up to our Christmas muffins. 

Let's start baking! 

Blueberry – Cream Muffins

4 Eggs
2 Cups sugar
1 Cup canola oil
1 Teaspoon vanilla extract
4 Cups all-purpose flour
1 Teaspoon salt
1 Teaspoon baking soda
2 Teaspoons baking powder
2 Cups fat-free sour cream
2 Cups blueberries
½ Cup skim milk
Cinnamon sugar for sprinkling

1.      Beat eggs. Gradually add sugar. While beating, slowly pour in oil. Add
vanilla.
2.      Combine dry ingredients. Add alternately with the sour cream to the
egg mixture. Gently fold in blueberries.
3.      Spoon into greased muffin tins and sprinkle with cinnamon sugar.
Bake at 400 degrees for 20 minutes.
4.      Makes 24 muffins.


You should have most of the ingredients already in your kitchen. If you don't have fresh blueberries on hand you can use any other kind of berry or even frozen blueberries. Also you don't have to use fat-free sour cream and skim milk; I made mine with regular sour cream and 2% milk and the muffins turned out perfect! 


Before you start mixing the ingredients together, I would recommend getting your muffin tins ready. The recipe says to grease the tins, but I used paper muffin cups and it worked just fine. Also, be sure to set your oven to 400 degrees! 


The first step of the recipe is to beat the eggs like you would to make scrambled eggs. I used my big electric mixer for this recipe, but you can use a handheld mixer too. Once the eggs have been beaten you will need to gradually add the sugar while stirring the mixture. 


Be sure to use a spatula to scrape the sides and bottom of the bowl so the sugar gets incorporated. Keep the mixer on a medium to high speed and gradually add the canola oil. 


Once the oil has been added to the mixture it should be light and fluffy. You can now add the vanilla extract and mix on a medium speed until fully incorporated. Your mixture should look like this once all of the liquid ingredients have been added:


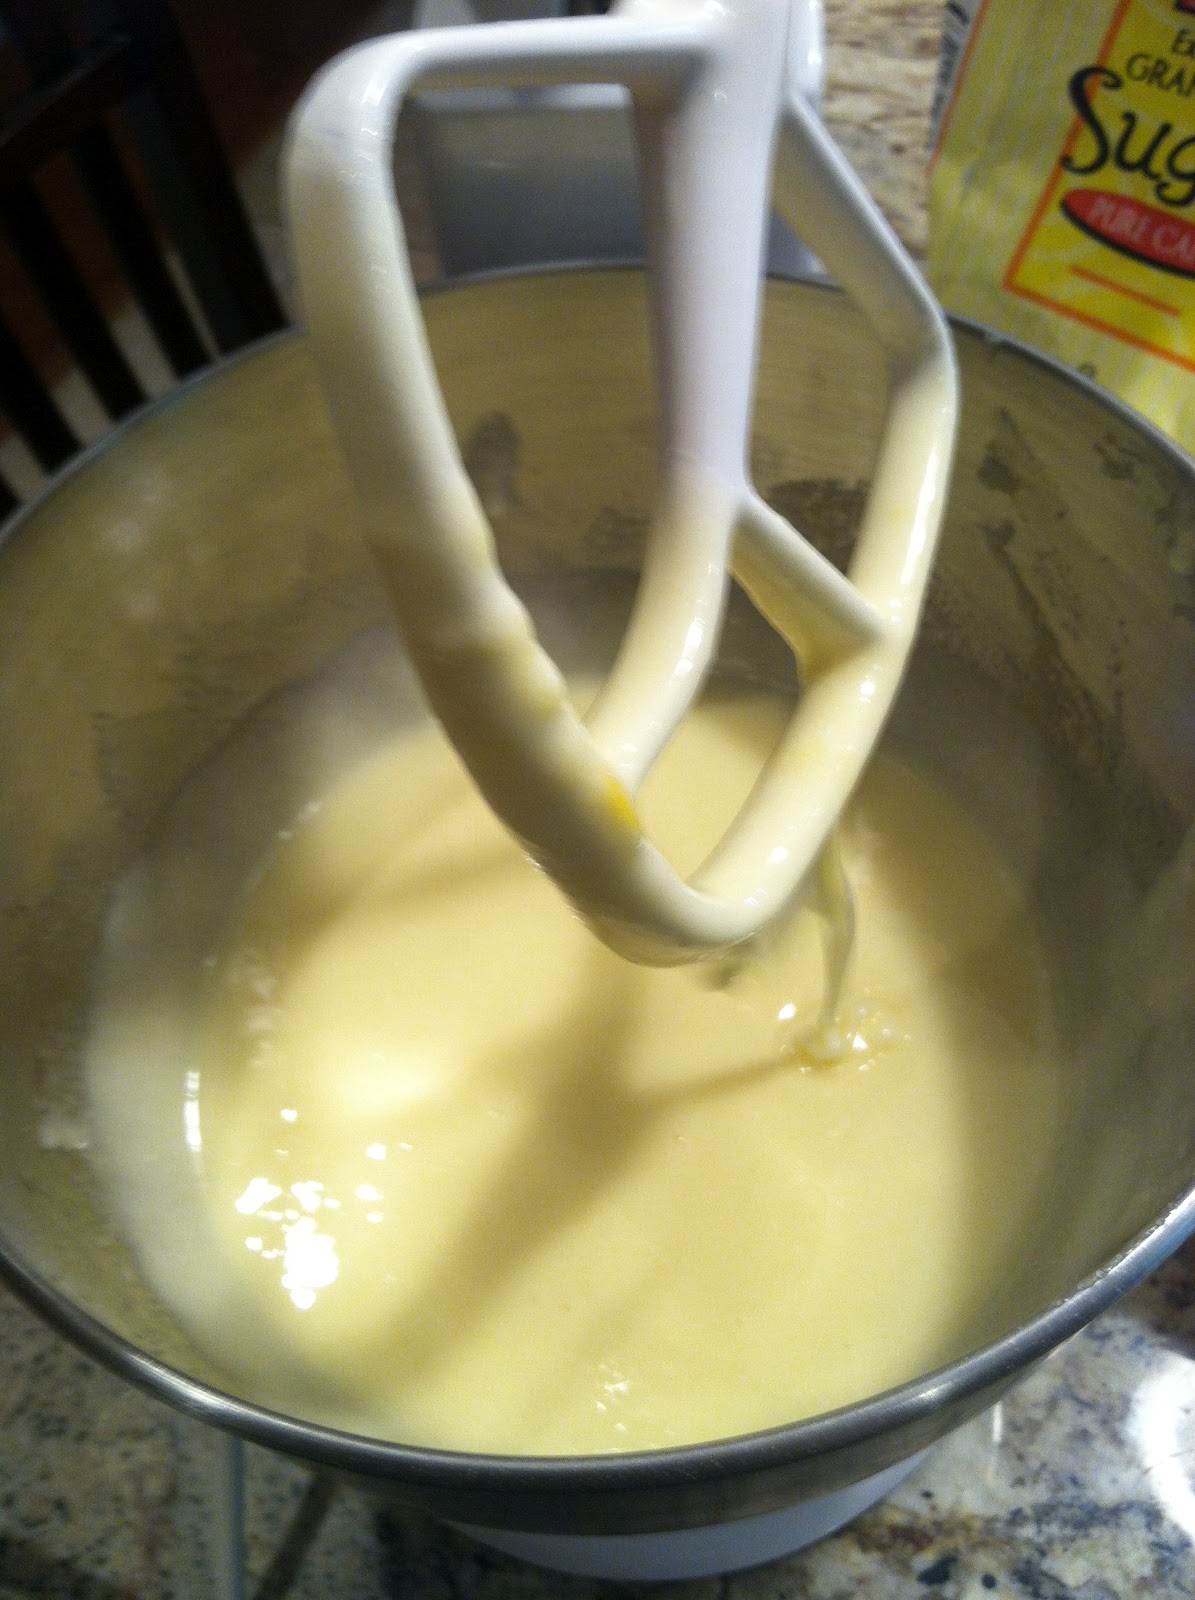
****Warning!!!!**** The recipe calls for skim milk, but never gives you the instructions to put it in the batter! (Another over look by the newspaper editor!) I added the milk to the recipe now, before adding the dry ingredients. Once you've gotten the milk into the batter, put it to the side. 

Next you'll want to use a separate bowl to mix the flour, salt, baking soda, and baking powder together. 


Once the dry ingredients are mixed well you can gradually add them to the egg mixture. You'll want to keep your mixer on a low to medium speed so the flour doesn't get all over your kitchen! Start by adding about a 1/4 cup of dry ingredients at a time:


Once you have about 1/4 cup of the dry ingredients in the egg mixture, keep the mixer on and add about 1/4 cup of the sour cream. 


Be sure the sour cream is completely mixed in before adding another 1/4 cup of the dry ingredients. Continue this pattern until all of the dry ingredients and sour cream have been mixed in. Your batter should look like this:


It's not a very thick batter, but not runny either. For the next step you can take the mixing attachment off of your mixer and use a regular spatula. You'll want to add the blueberries about a cup at a time to the mixture. Be gentle in this process so the blueberries don't break and cause you to have a blue batter! 


Once you've gotten the blueberries mixed into the batter you are ready to fill the muffin tins. The easiest way to fill the tins is by using an ice cream scoop. The scoop is the perfect size for a muffin and makes the transition from the mixing bowl to the tins fairly easy and less messy. Make sure each muffin paper is filled about 3/4 of the way. They will puff up, but not enough to spill over the edges. 

Once all of the batter is in the muffin tins you can sprinkle each one with a little cinnamon and sugar. If you're not a fan of cinnamon you can just use sugar or leave them plain as well. As you can see below, the recipe clearly makes more than the 24 muffins it claims! I ended up baking a loaf too! If you've filled all 24 tins and still have batter left over you can make a loaf (be sure to grease the pan before pouring in the batter) as well or if you have more muffin tins you can make more muffins. Trust me, they will get eaten! 


The muffins (and loaf) are now ready to be cooked. Place them in the 400 degree oven for 20 minutes. Be mindful of the time because mine were perfectly done at exactly 20 minutes. However, the loaf took about 50 minutes to bake. 

To be sure they are completely cooked you can stick a toothpick in the middle of a muffin or the loaf and if it comes out clean they're ready to cool.

No need to worry about taking the muffins out while they're hot; since they're in the paper cups they won't stick to the tins. If you made a loaf I would definitely run a knife around the edges of the pan before it completely cools. 


I ended up freezing the loaf I made and will use it at a later date. Don't hesitate to give these babies a try! They are best eaten when still warm and with a little butter on the inside. 

This recipe definitely deserves a 5 out of 5 on the yummy scale! 


Although the recipe itself had a glitch with the way it was written, it was pretty straight forward and easy to make. You can always change up the fruit or even add nuts to the recipe too. They will never be as good as our Christmas morning muffins, but are definitely great for a Sunday breakfast or to make at the beginning of the work/school week for a quick and delicious start to your day!

Happy Baking!


Monday, September 17, 2012

Heart of My Heart Tarts

Heart of My Heart Tarts


This recipe was listed under the D tab for desserts in the recipe box. 

When I found this recipe I was intrigued to bake it because it looked like a creative way of expressing your love for someone through baking. I have to admit, I'm usually not very creative when it comes to baking! Whenever I try to write on cakes or make a design it always comes out awful. But, to my surprise, the recipe isn't so hard to follow or make look ascetically pleasing. It just has many steps. I'm not sure where the recipe originally came from, but it looks like a newspaper clipping.

Before I read the entire recipe I assumed it would be a tart; similar to a fruit tart that you see in pastry shops. The ones that look like mini pies with fresh fruit and a glaze on the top. I was wrong! It's actually a meringue recipe with ice cream and a fruity syrup topping. 

When I asked, my mom said she had never made this recipe. She said  my father doesn't like meringues, but that she must have chosen the recipe because she was building her recipe box and didn't know how to cook at the time. Finding out that my mother had never tried baking this recipe made me even more intrigued to try it out! Here it goes...


Heart of My Heart Tarts
                        
20 Crackers (unsalted tops), finely
            rolled (about ¾ cup crumbs)
¾ Cup chopped blanched almonds
3 Egg whites, at room temperature
½ Teaspoon cream of tartar
1 Cup granulated sugar
1 Pound frozen whole strawberries in
            syrup
Water
1 Tablespoon cornstarch
1 Tablespoon lemon juice
1 Pint vanilla ice cream

Combine first two ingredients. Set aside. Beat egg whites with
cream of tartar until soft peaks form. Beat in sugar a tablespoon
at a time, beating until stiff and glossy. Fold in crumb mixture.
Place brown wrapping paper on cookie sheet, grease well, and shape
meringues into six small heart-shaped tarts, pulling the sides up with
a spoon. Bake in preheated oven (300 degrees) for 25 to 30 minutes or
until lightly browned. Immediately remove with care from cookie
sheet and place on wire rack to cool.

To make sauce, drain strawberries, reserving syrup. Add enough water to
make 1 ¼ cups; heat to bubbling. Stir cornstarch into lemon juice. Blend
into hot syrup. Cook, stirring constantly, until thickened and clear. Cool,
add strawberries. Using a melon ball scoop, make ice cream balls. (These
may be done in advance and left in the freezer until ready to use.) Place five
ice cream balls on each cooled meringue heart. Pour sauce over ice cream.
Makes six tarts.


Before starting the recipe be sure to set your oven to 300 degrees. You will also want to get the eggs out of the refrigerator now so they can be room temperature when you're ready to use them. I also suggest getting your cookie sheet ready now. You will need to place parchment paper (they refer to it as brown wrapping paper in the recipe, but you definitely don't want to put gift wrapping paper on a cookie sheet in the oven!) on the cookie sheet and coat it liberally with a non-stick spray. Be sure the edges of the parchment paper don't stick up above the edges of the cookie sheet or they might burn! 


Next you'll need to crush your crackers. I used saltines, but you can use any kind of cracker you'd like. For more of a sweet flavor I would suggest using graham crackers. I placed the 20 crackers in a plastic storage bag and used my rolling pin to break them into crumbs. Be sure to crush the crackers as small as you can so there aren't any huge chunks in your meringue. You can also use a food processor if that's easier for you. Once you've measured out your cracker crumbs; combine them with the almonds and set the mixture aside. 


You'll need another bowl and an electric mixer for this next part. Separate the 3 egg whites from the yolks and add them to the bowl with the cream of tartar. With your electric mixer, beat the egg whites and tartar on high until it starts to form soft peaks. 


Next, you'll need to add the sugar a tablespoon at a time while continuing to beat the egg white mixture. Once the entire cup of sugar is incorporated the mixture should have a stiff glossy texture like this...


Finally, add the cracker and almond mixture to the egg white mixture by folding it in with a regular spatula (don't use the electric mixer for this part). 


Now comes the fun/creative part! Once both mixtures have been combined you'll need a tablespoon to place the meringues on the cookie sheet. First place six piles of the mixture, with enough space between them so they don't mush together, on the cookie sheet. You can attempt to make hearts out of the spoonfuls of meringue in any way you'd like, but I found it easiest for me to go around the edge of each pile with a spoon and shape it into a heart. Once you get to the top part where the heart folds in you can use your spoon to push the middle section down towards the bottom of the heart. This will create the top of the heart shape. Be sure to smooth most of the body of the meringue down before cooking them so they don't burn. 


Once you have six heart shaped meringues on your cookie sheet, place them in the oven for 25 to 30 minutes or until they have a light brown color on top. When they're finished cooking, make sure to immediately take them off of the cookie sheet and move them to a wire rack for cooling and to prevent them from sticking to the parchment paper. 


While the meringues are in the oven you can get to work on the strawberry sauce. First drain the strawberries, but reserve the sauce/liquid they are in to a measuring cup. Add enough water to the strawberry syrup to make 1 & 1/4 cups. Transfer the water and syrup mixture to a medium sized pan and heat until it starts to bubble. 

While you're waiting for the syrup mixture to bubble you will need to combine the cornstarch and lemon juice in a separate bowl. You can use a spoon to mix them together; no need for the electric mixer. Just be sure that there are no lumps before the next step. 


Add the lemon and cornstarch mixture to the hot syrup and stir constantly until it becomes thick and clear. Mine took about 15 minutes to thicken up. Be sure that you are constantly stirring the mixture during this time to prevent it from burning.


Once the mixture is clear and thick you can remove it form the heat and let it cool completely. It should harden up a little more and have a layer of "skin" on the top. The kind pudding also gets when it cools.


Once the syrup has cooled you can add the strawberries to it. My strawberries were still a little frozen so I put the whole syrup and strawberry mixture back on the stove for a few minutes to take the chill off before serving.  


When you're ready to serve your heart shaped dessert you will need the vanilla ice cream. You can use a melon ball scoop as they suggested, but a regular ice cream scoop will work just as well. Place as much ice cream as you'd like on top of the heart meringue and then cover with the yummy strawberry syrup!


Congratulations, you've just made a very fruity meringue dessert! I'm sure yours looks much nicer than mine since I'm definitely not an artist! 

I gave this recipe a 5 out of 5 on the yummy scale. I really love the almond flavor combined with the strawberries. I'm usually not a fan of meringues, but this recipe gave them an unusual shape and texture and won my affection! 


You can always change the kind of fruit you use for the syrup to whatever you have in the house or whatever is in season. A blueberry syrup would be delicious! Also you can change the kind of nut in the meringue, but just be sure they are cut finely so they don't make the mixture too chunky. 

I hope you enjoy this dessert with your sweetheart! 


Friday, September 7, 2012

Wacky Cookies

Wacky Cookies (Keep Secret)


I found this recipe under the C tab for cookies in the recipe box.

What's the first thing that comes to your mind when you think of sauerkraut? A hot dog during a summer party? A hot Reuben sandwich? Chances are the word cookie never crossed your mind, but that's the next recipe I'm attempting in my mom's recipe box!


I was obviously intrigued by the name and couldn't help but wonder who would ever think to put sauerkraut in a cookie! When I asked my mom about this recipe she said she used to make a cake with sauerkraut in it too that my father loved years ago. (I will have to add that to the list of recipes to try). She said the sauerkraut creates a texture like coconut. I was so eager to bake these top secret (although clearly published in some Chicago paper) cookies! 


Wacky Cookies Keep Secret
Try these wacky cookies for a surprisingly
different taste. Kraut is added but the cookie
flavor won’t give away the secret.

¼ Lb. stick margarine
1 Cup Sugar
1 Egg
1 Cup drained sauerkraut, rinsed and finely chopped
1 Teaspoon Vanilla
1 ½ Cups sifted flour
1/3 Cup unsweetened cocoa
1 Teaspoon baking soda
¼ Teaspoon salt

Cream margarine and sugar; beat in egg; stir in kraut and vanilla.
Sift together flour, cocoa, baking powder, soda, and salt: with a
wooden spoon, gradually work into kraut mixture.
Drop by level tablespoonfuls, about 1 ½ inches apart,
onto ungreased cookie sheet. Bake in a preheated 375-degree
oven 8 to 10 minutes; do not over-bake. At once remove with
wide spatula to wire rack to cool. If desired, cover with chocolate
frosting. Makes about 3 ½ dozen.


After you set your oven to 375, the first thing you'll need to do is strain and wash the sauerkraut. I put mine in a colander and let it sit under running water in the sink while I got the rest of the ingredients together. 

Once the sauerkraut is washed thoroughly, be sure to squeeze out all of the remaining liquid. You'll then need to chop it into very fine pieces. Since I cut this recipe into thirds, to prevent having an over abundance of cookies in the house, I just chopped the sauerkraut on a regular cutting board. However, if you're going to make the full recipe I highly recommend using an electric chopper. 

Next you will need to cream the sugar and margarine until they are well combined.


The best options is to use an electric mixer so you don't have to do all the work! Then you'll need to beat the egg into the sugar and margarine mixture. (Since I cut the recipe down to a third of the ingredients, I had to mix the egg together in a measuring cup first to be sure I could split it up into the correct measurement). The mixture will be very light and fluffy.


Once the egg is incorporated well into the mixture you will need to add the drained and chopped sauerkraut as well as the vanilla. Mix this on medium speed until everything is incorporated. 


In another bowl, sift together the rest of the dry ingredients; flour, cocoa, baking soda, and salt. The original recipe only lists baking soda, however the instructions tell you to add baking powder too (a flub on the editor's part) so I just used the baking soda it calls for and the recipe turned out fine. 

You can put away your electric mixer now since we'll be using a wooden spoon for a gentler mix. Gradually mix the dry ingredients into the wet sauerkraut mixture with the wooden spoon. 


As you gradually mix the dry ingredients with the wet ones you will notice the color of the batter will darken to a rich chocolate color. When both mixtures have been incorporated you should end up with a batter that looks like this:


It will be slightly lumpy due to the sauerkraut. Next you'll need your baking sheet. Don't bother to grease or spray it though. The batter has enough margarine to keep the cookies from sticking to the sheet. Use a tablespoon to drop the dough onto the cookie sheets. Be sure there is about an inch between each cookie so they don't mush together and will bake evenly.


Your cookies are now ready for the oven! Mine only took 8 minutes  to bake so be sure to set a timer or keep a close eye on them. The finished product will look like this:


Be sure you take the cookies off the sheet immediately and transfer to a wire rack so they can cool completely. 


Ta-da! You've successfully made some yummy top secret cookies with a pretty strange ingredient. Once the cookies have cooled you'll want to taste these unusual treats right away! 

I rate these cookies a 4 out of 5 on the yummy scale. They were very chocolaty and moist, but the texture was a bit like eating a cake. I like my cookies to be a little crunchy not sponge-like. However, I was very impressed that they didn't seem to taste at all like sauerkraut. Since it was washed of it's sour and bitterness before going into the batter I think it turned out to be exactly like my mom said, a coconut impostor! 


The original recipe recommends adding chocolate icing to the tops of the cookies, but I'm not  a chocoholic so I just left them as they are. Don't be afraid to give the icing a try or even make them into little cookie ice cream sandwiches; perfect for the kids or sweet tooth in your life! 


Don't hesitate to make these super chocolaty delights because of their unusual ingredient! And don't worry, you can share this recipe with anyone you like! No one came after my mom since she clipped the recipe out of the newspaper before I was born; I'm sure you won't be prosecuted (but whoever edited the original recipe should be for that typo)! 


Monday, September 3, 2012

Blueberry Grunt


Blueberry Grunt 


Listed under the D tab for dessert, I couldn't help but wonder what exactly a grunt is.

  • Grunt has many meanings, but in regards to cooking it is a typical New England dessert that consists of stewing fruit and topping it with dough which steams as the fruit cooks.


I'm not sure where the original recipe came from, but it looks like a newspaper clipping; yellowed with an advertisement on the back and glued to the front of a note card. I would assume my Mother took a liking to this recipe because of its New England origin. 

My Mother's heritage is English and I'm sure that spiked her interest being that she was first learning how to cook far away from home. My Father was stationed in the U.S. Navy in Corpus Christi, Texas where they lived for a few years after their wedding. While becoming the perfect housewife, she started building her recipe (shoe) box, which has remained the same since she first started it. 

When I told her my plan to make the recipe she said "Oh, you're going to make that?" with a sour face. She had made it once and it didn't turn out so well. But, it remained in the recipe box.

Thus bringing us to the purpose of my blog; to make the recipes my Mother decided were great so very long ago and to see if they ever were really that great!

Without any further ado, here is a copy of the original recipe:


Blueberry Grunt
This old-fashioned New England fruit
Dessert has a topping of deliciously
Flavored little dumplings.
Makes 4 servings at 19 cents each.           


1 Cup sifted all-purpose flour
1 ½ Teaspoons  baking powder
½ Teaspoon salt
2 Tablespoons brown sugar
3 Tablespoons vegetable shortening
½ Cup milk
½ Cup granulated sugar
½ Teaspoon ground nutmeg
1 Teaspoon lemon juice
1 Cup water
2 Packages (10 oz. each) frozen blueberries (dry pack, no sugar), thawed

1)       Sift flour, baking powder and salt into a medium-size bowl; add brown sugar. Cut in shortening with a pastry blender until mixture is crumbly. Add milk all at once; stir with a fork just until mixture is moist; reserve.
2)       Combine sugar, nutmeg, lemon juice and water in a medium-size saucepan; add blueberries; bring to boiling.
3)       Drop dumplings by tablespoonfuls on top of hot fruit mixture; cover tightly. Reduce heat and simmer 20 minutes, or until dumplings are puffy-light and fruit mixture is thickened. Serve with cream, if desired.


As I started the recipe I realized that most of the ingredients are already in our pantry. (Which is helpful when you need to make a dessert on short notice.) So I gathered all the ingredients and began my journey towards a hopefully delicious 'grunt' hoping it would go smoothly and I wouldn't be grunting through the process!


The first step is to sift the dry ingredients into a bowl. (I used an electric mixer, but you can use a hand held mixer as well). Instead of using a standard sifter, I used a very fine strainer which worked well and saved me some time.


Next up, the brown sugar. In case you're not a seasoned cook, you need to pack the brown sugar tightly into the tablespoon to be sure you have the right measurement, before putting it into the bowl. Then turn your mixer on to a light - medium speed until the dry ingredients and the brown sugar have combined. 

Cut the shortening in to the dry ingredient and brown sugar mixture. (I have a pastry hook for my mixer, but the regular attachment worked just fine.) What you'll want to do is add the shortening a little bit at a time while the mixer is on low to medium speed. By doing this you can be sure everything will become incorporated and the mixture will be crumbly. 


You can now turn your mixer off and detach the mixing bowl. Add all of the milk at once and incorporate it by mixing with a fork just until you see the original mixture become moist. Your mixture should look somewhat like this:


Once you've combined the milk with the rest of the mixture you can put it to the side.

Next you'll need to combine the sugar, water, lemon juice, and nutmeg in a medium sauce pan over the stove. The mixture will look pretty murky, but not to worry, it won't stay that way! 


Turn your stove on medium-high and add the blueberries to the pan. Once you've stirred in the blueberries you can let it cook until it boils. 


Now comes the fun part! Once the mixture has reached a boiling frenzy you'll need the doughy mixture we set aside before. You'll also need a tablespoon to scoop out the dough. Scoop full tablespoons of the dough and plop them into the boiling fruit mixture one by one. 

Careful, the mixture is hot so don't stand too close or you may be burned by splashing sauce!

Most of these dough plops will sink to the bottom of the pan. There should be about 8 or 10 of them all together.


Once you've gotten all of the dough mixture into the fruit mixture you can put the top on and let it do its magic! Be sure to reduce the heat to avoid burning. 

The recipe says it should cook for 20 minutes, however mine cooked for a good 40 minutes before I decided it was the right consistency. (Maybe cooking time went faster back in the 1970's!) 

Your finished product should look somewhat like this:


The recipe says you can add cream on the top to serve, but I'm a firm believer that ice cream makes everything better, so I added a few scoops of vanilla and voila a Blueberry Grunt! 


While this is not the best dessert I ever had, I supposed I wasn't expecting it to be! That being said, I rated this dessert a solid 3 out of 5 on the yummy scale.


While the blueberries were warm and gooey and it had just the right amount of spices, the dough wasn't what I was expecting. I was imagining something like a doughnut texture and instead it was more of a spongy goo. I suppose that's due to the steaming process? But at least there was no grunting during the cooking process! It was a pretty easy recipe and overall it wasn't so bad given the name and age! I also like that the original recipe tells you how much to expect to spend for each serving. Although the cost of each ingredient has changed tremendously since the recipe was first printed, I still think it is a pretty inexpensive choice.

recommend making this on a cool fall day since it will fill your house with wonderful aromas and make you feel all warm and cozy! You can change up the fruit in the recipe as well in case you don't like/have blueberries on hand. Just be sure whichever fruit you chose will pair well with nutmeg. 

I hope you enjoy the recipe and share it with fellow adventurous cooks!